Creating Ports#
Ports are the foundation of the ServiceFabric platform. They connect your equipment to the network and allow you to attach virtual cross connects to a multitude of services.
Note: Remember to order your cross connect after you complete the port creation.
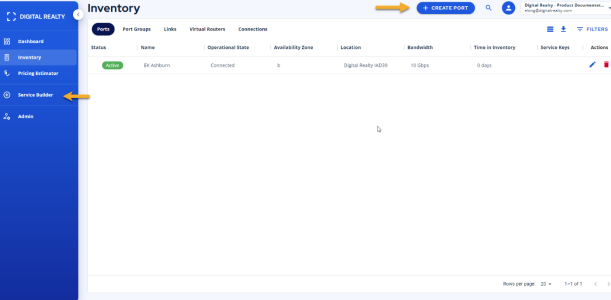
- Click the Service Builder icon on the left navigation panel or CREATE PORT button, as shown below.
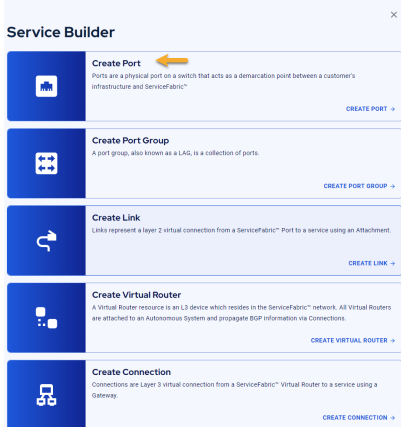
- Click the Create Port option on the Service Builder menu.
- Enter the necessary information as required by the Add Port form (Name, Location & Speed are required fields).
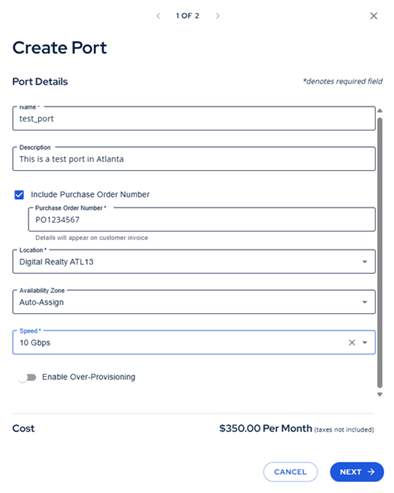
Note: Purchase Order Number: Now you can add a PO# that will be appended to this line item on the ServiceFabric bill. Enable the checkbox and enter your PO#.
- Click NEXT button at the bottom of the form. Verify your details are correct.
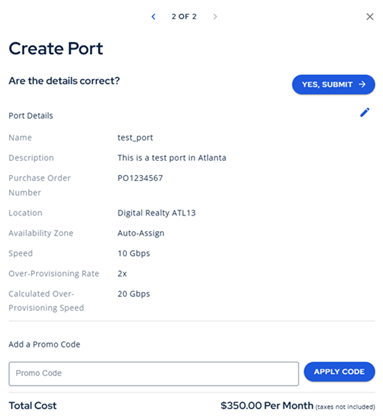
NOTE: If you have a promotional code for discounts, you may enter it in the Promo Code box and click APPLY CODE.
- If everything looks good, click the SUBMIT butoon.
- You may click the CANCEL button at any time to close the form without saving.
Create Port Group#
- Click the Service Builder icon on the left navigation panel or the CREATE PORT GROUP button, as shown below.
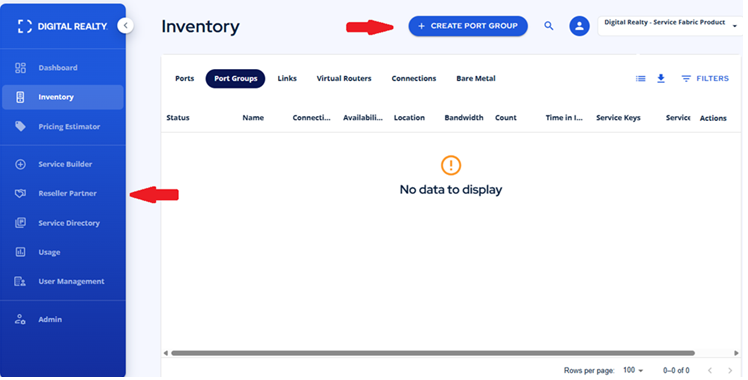
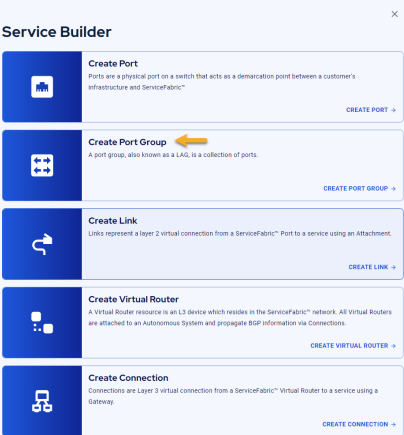
- Click the Create Port Group option on the Service Builder menu.
- Enter the necessary information as required by the Add Port Group form (Name, Location, Port Count & Speed are required fields).
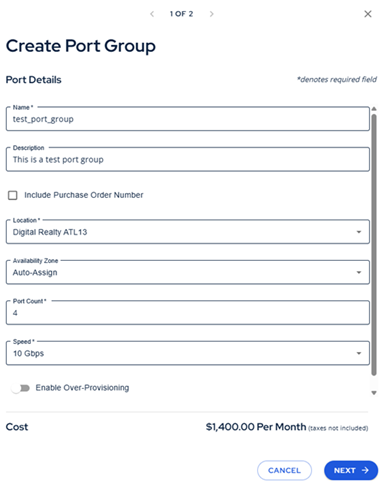
Note: Purchase Order Number: Now you can add a PO# that will be appended to this line item on the ServiceFabric bill. Enable the checkbox and enter your PO#.
- Click NEXT button at the bottom of the form. Verify your details are correct.
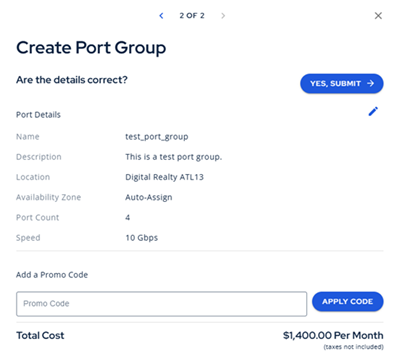
NOTE: If you have a promotional code for discounts, you may enter it in the Promo Code box and click APPLY CODE.
- If everything looks good, click the SUBMIT butoon.
- You may click the CANCEL button at any time to close the form without saving.
Getting Your Port or Port Group Connected to ServiceFabric#
After saving, the port(s) must go through the port setup procedure.
This involves:
- Downloading the Letter of Authorization
- Submitting a request to install cross connects to the ServiceFabric platform. You will upload the LOA with your request.
Overprovisioning#
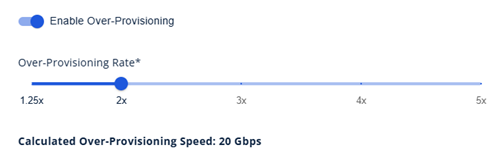
You can choose the Restrict Over-Provisioning Rate option and change the rate to your desired level. This can be useful if you add your port to a directory service.
Editing or Deleting Ports or Port Groups#
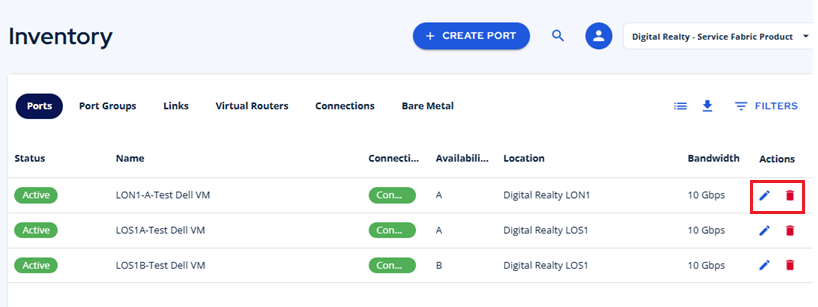
- INVENTORY METHOD: Open the Inventory page for ports or port groups and select EDIT or DELETE from the Action column:
- DETAILS PAGE METHOD: Open the port or port group and select from the icons at the top:
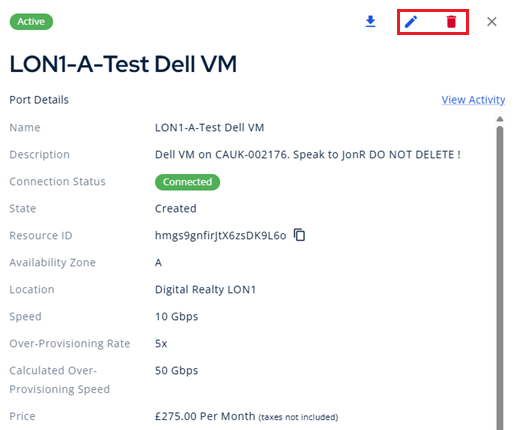
- You can edit the NAME and DESCRIPTION for any port or port group.
- To edit the details of a port group, select the port within the group you wish to edit.
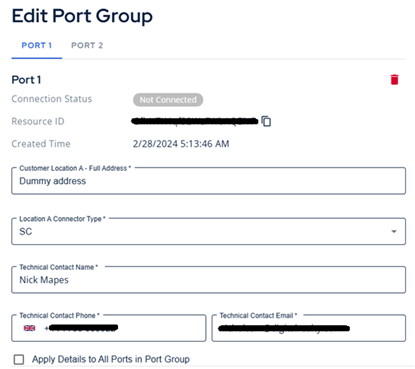
Edit the details for each port or apply the changes to all ports in the group.
- To add more ports, click the Add Port button:
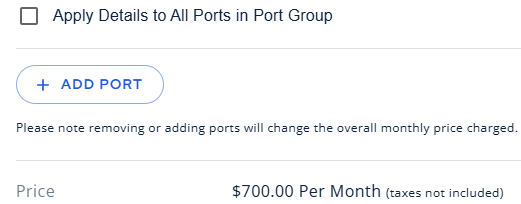
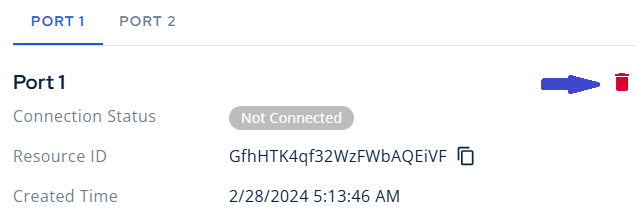
- To delete ports from your group, click the trashcan button: