Create Link (Layer 2)#
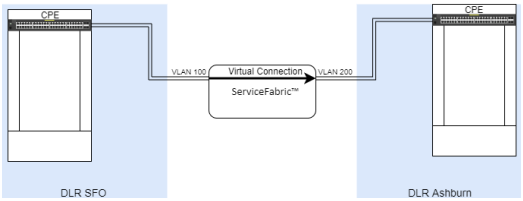
Links are layer 2 virtual cross connects between two ports, or between a port and a service such as bare metal servers. Make sure you have at least two end points before you begin.
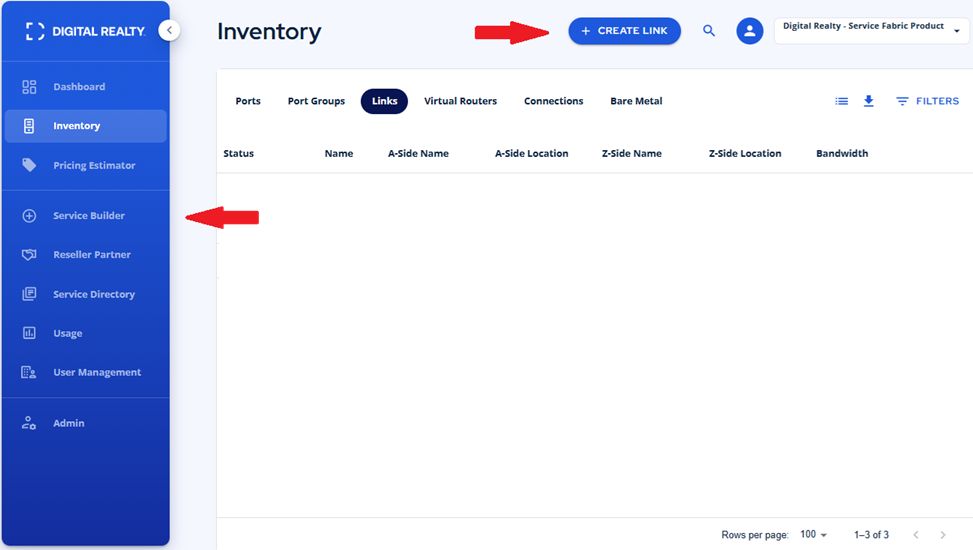
Click the Service Builder icon on the left navigation panel or the CREATE LINK button found under Inventory and the Links tab:
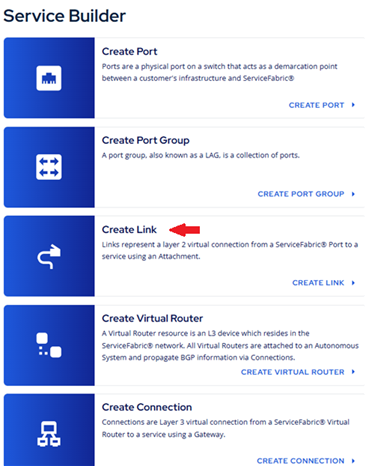
Click the Create Link option on the Service Builder menu:
Connect to Self#
By utilizing links, you can build layer 2 connections between two existing ports.
Step 1: A-Side Configuration - Connect to Self#
Enter the required information and make any VLAN selections you need:
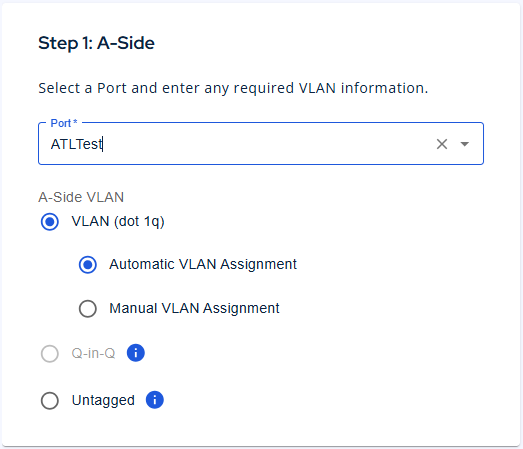
-
Port - Choose from an existing port
-
A-Side VLAN - Configure your VLAN settings for the A-Side
-
Automatic (ServiceFabric Chooses)
- Manual (Customer Chooses)
- Dot1Q (see Dot1Q section)
- QinQ (see QinQ section)
- Untagged (See Untagged)
Step 2: Z-Side Configuration - Connect to Self#
Enter the required information and make any VLAN selections you need:
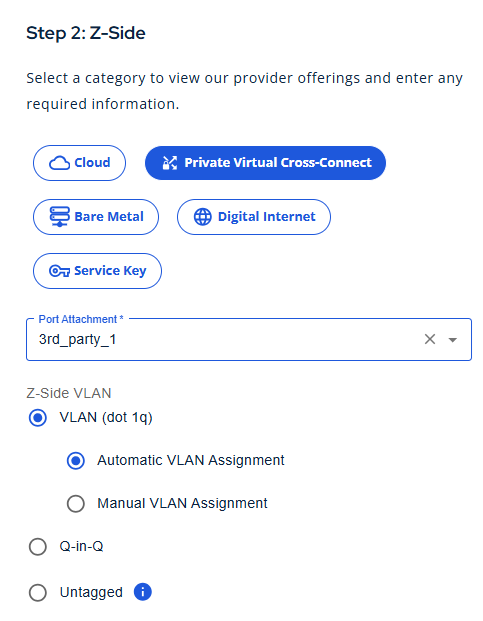
- Select Private Virtual Cross Connect as your attachment type
-
Select a pre-existing port
-
Z-Side VLAN - Configure your VLAN settings for the A-Side
- Automatic (ServiceFabric Chooses)
- Manual (Customer Chooses)
- Dot1Q (see Dot1Q section)
- QinQ (see QinQ section)
- Untagged (See untagged section)
Step 3: Select Speed - Connect to Self#
- Select a speed and a price will populate.
- Click the NEXT button to confirm your selections.
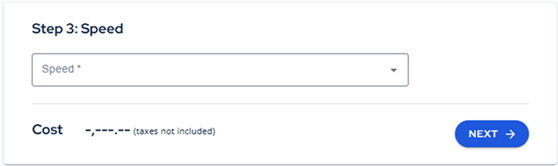
Step 4: Naming and PO Number - Connect to Self#
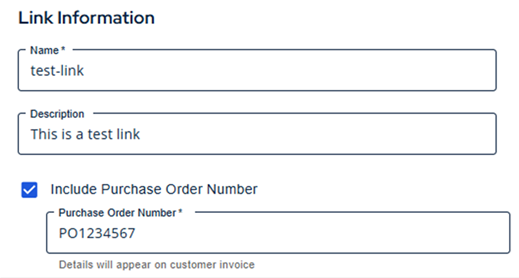
- Name - unique name for the port
- Description - Optional user-provided description for the port
- Purchase Order Number: Now you can add a PO# that will be appended to this line item on the ServiceFabric bill. Enable the checkbox and enter your PO#.
Step 5: Complete - Connect to Self#
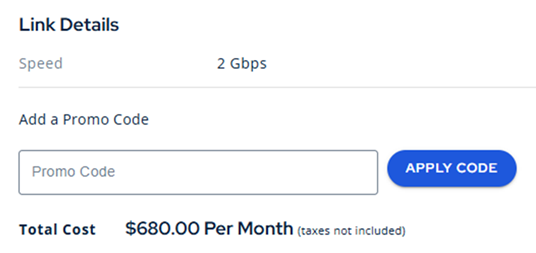
- Verify your information and click YES, SUBMIT.
NOTE: If you have a promotional code for discounts, you can enter it in the Promo Code box and click APPLY CODE.
You may click the CANCEL button at any time to close the form without saving the link.
Connect to Cloud#
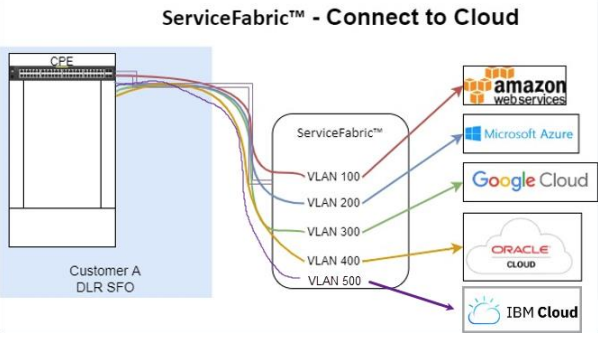
Connecting to clouds is easy. Before you begin, make sure you have at least one existing port.
Step 1: A-Side Configuration - Connect to Cloud#
Enter the required information and make any VLAN selections you need:
- Port - Choose from an existing port
- A-Side VLAN - Configure your VLAN settings for the A-Side
- Automatic (ServiceFabric Chooses)
- Manual (Customer Chooses)
- Dot1Q (see Dot1Q section)
- QinQ (see QinQ section)
- Untagged (see Untagged)
Step 2: Z-Side Configuration - Connect to Cloud#
Enter the required information and make any selections you need:
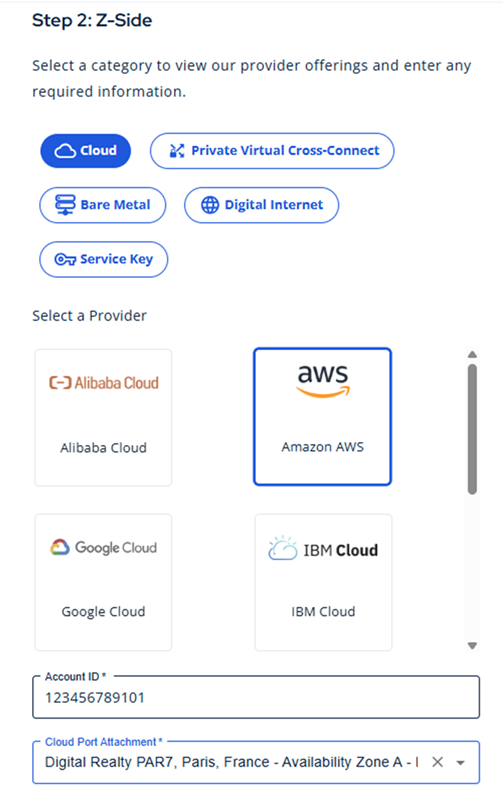
- Select Cloud as your attachment type
- Select your desired Cloud Provider as your attachment type
- Enter your required account ID
- Select the location where you wish to attach to the cloud provider
Step 3: Select Speed - Connect to Cloud#
- Select a speed and a price will populate.
- Click the NEXT button to confirm your selections.
Step 4: Naming and PO Number - Connect to Cloud#
- Name - unique name for the port
- Description - Optional user-provided description for the port
- Purchase Order Number: Now you can add a PO# that will be appended to this line item on the ServiceFabric bill. Enable the checkbox and enter your PO#.
Step 5: Complete - Connect to Cloud#
- Verify your information and click YES, SUBMIT.
NOTE: If you have a promotional code for discounts, you may enter it in the Promo Code box and click APPLY CODE.
You may click the CANCEL button at any time to close the form without saving the link.
Connect to Bare Metal Server#
Connecting to your Bare Metal Servers is easy.
- Follow Steps 1 and 2 from above, but choose Bare Metal as your Z-Side attachment type:
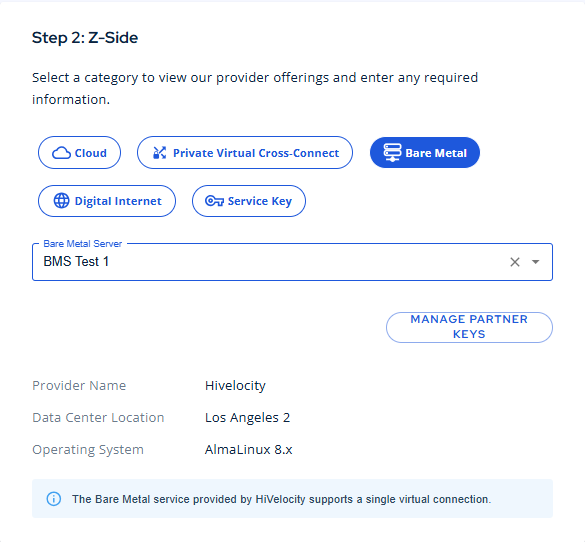
- Select your Bare Metal from the dropdown and continue with Step 3, selecting your speed.
Editing Your Link#
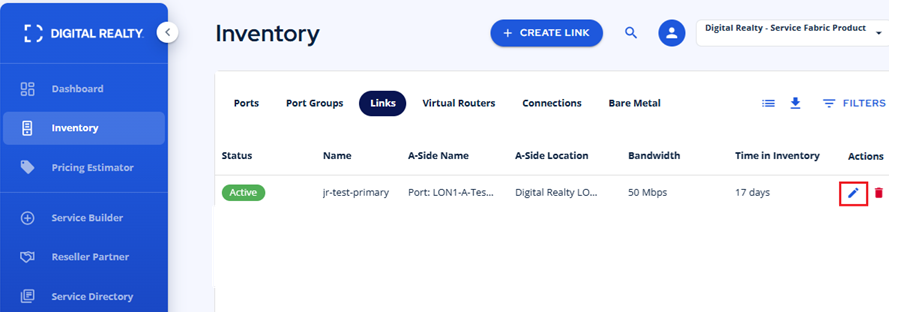
- Open your Link by going to Inventory and clicking the red pencil icon for the link you wish to edit. It's on the right beside the delete icon under the Actions column.
You can edit the following settings for your link:
- Name
- Description
- A or Z Side VLAN details
- PO Number
- Cloud details (if connected to a cloud onramp)
- Speed
NOTE: The ability to change the speed is dependent on the cloud provider or partner API.
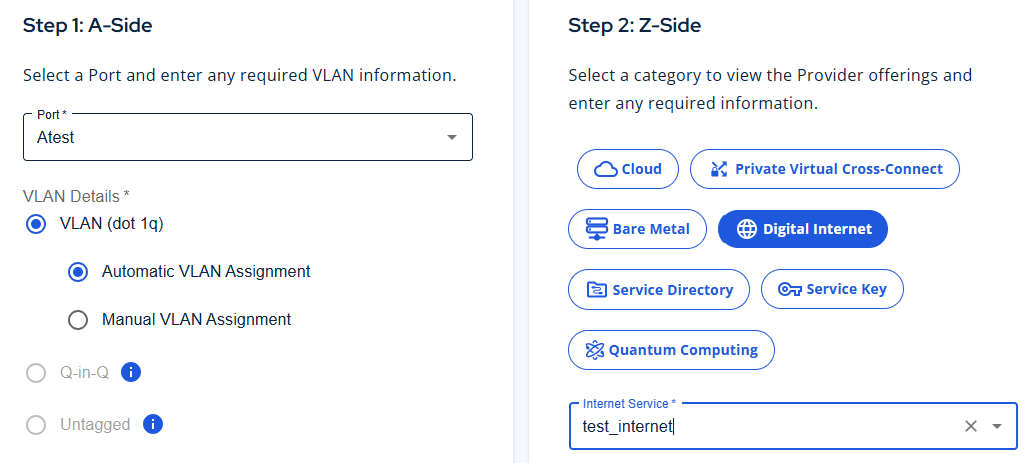
Connect a Link to Digital Internet#
It's possible to remove the Link attached to your Digital Internet and add another. If you remove the Link to your Internet, you can create another and reattach it.
Visit Inventory and click the Link tab. Choose Create Link and proceed as described above. Choose your A-Side port and on the right select Digital Internet as the attachment type. The dropdown will populate with your existing Digital Internet services. Select the required Internet service and choose your new speed.
Click NEXT to proceed.